


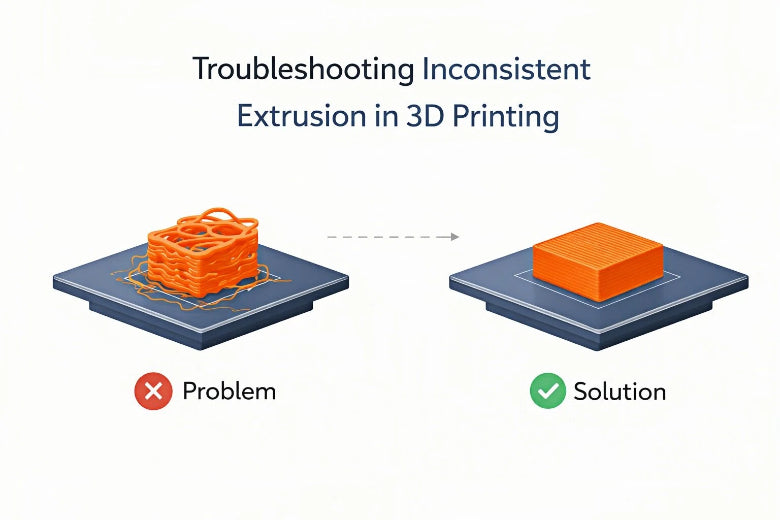
If you want to fix inconsistent extrusion 3D printing, first check your filament quality. Clean or change the nozzle if needed. Calibrate your extruder to ensure it operates correctly. Adjust slicer settings for better results. Inconsistent extrusion 3D printing can manifest as uneven layers or gaps in your prints. Sometimes, parts may feel weak or spongy. You might notice thin or missing layers, blobs, or pockmarks on the print. These issues are common in 3D printing. Small changes in temperature, gear tension, or filament can lead to significant problems.
|
Visual Defect |
Description |
|---|---|
|
Layers look uneven or wavy |
|
|
Gaps and Holes |
Spaces where filament should be |
|
Blobs and Zits |
Small bumps from changes in plastic flow |
|
Thin or Missing Layers |
Gaps where plastic was not put down |
|
Pockmarks and Gaps |
Tiny holes or a webbed look on the surface |
|
Weak, Spongy Parts |
Prints feel light and break easily when touched |
Key Takeaways
- Look at the filament before you print. Wet or bad filament can make weak prints and holes.
- Clean or change the nozzle often. A clean nozzle helps the filament move well and makes prints better.
- Set your extruder steps/mm the right way. Good calibration keeps the filament coming out the same for strong prints.
- Change slicer settings with care. Small changes in flow rate and speed can make prints much better.
- Make good habits for maintenance. Checking and cleaning often can stop problems and make prints more reliable.
Inconsistent Extrusion Explained
What Is Inconsistent Extrusion
Sometimes your 3D printer does not use the same amount of plastic each time. This is called inconsistent extrusion. It happens when the printer uses too much or too little filament. Inconsistent extrusion is a problem because it can mess up your prints and waste your time. You want your printer to work well so every layer sticks and looks nice.
There are many reasons for inconsistent extrusion. Some common causes are:
- The flow rate setting in your slicer is wrong
- The hotend temperature is too low
- The filament has moisture in it
- The extruder slips because the tension is weak or the gear is worn out
- Heat creep makes the filament soft too soon
- The filament diameter is not always the same
- The print speed is too fast
- The Bowden tube has friction or loose couplers
Visual Signs and Symptoms
You can find inconsistent extrusion by checking your prints. You might see gaps, holes, or wavy lines. Sometimes there are blobs or zits on the surface. Thin or missing layers can make your print weak. If you touch the part, it might feel soft or break easily. These signs show your printer is not feeding filament the right way.
Under-Extrusion vs. Over-Extrusion
It is important to know the difference between under extrusion and over-extrusion. Under extrusion means the printer does not use enough filament. Over-extrusion means it uses too much. Both problems can make your prints look bad.
Here is a table to help you compare:
|
Type of Extrusion |
Visual Cues |
Impact on Print Quality |
|---|---|---|
|
Over-Extrusion |
Raised ridges, drooping layers, messy surface |
Excess material leads to oversized prints and poor aesthetics. |
|
Under-Extrusion |
Subtle visual issues, gaps between layers |
Can result in weak prints that crumble or crack due to insufficient bonding. |
If you see under extrusion, check your printer right away. Fixing inconsistent extrusion early helps you get strong and smooth prints.
Causes of Inconsistent Extrusion
Filament Quality and Moisture
Check your filament before you print. Bad filament can make prints look rough. Wet filament causes bubbles and holes in your model. Steam from wet filament makes gas pockets. These pockets weaken the print and make it bumpy. Water in the filament also stops layers from sticking well. Your parts might break more easily. Steam inside the nozzle can make the plastic flow wrong. This can make your print the wrong size. Keep filament in a dry box or sealed bag to stop moisture.
|
Study |
Findings |
|---|---|
|
Fang et al. |
Wet filament makes prints weaker and changes how it melts. |
|
Hamrol et al. |
Moisture lowers strength by 25% and makes prints thicker. |
|
Halidi and Abdullah |
Wet filament can swell, block the nozzle, and stop extrusion. |
Nozzle and Hotend Issues
A clogged nozzle stops filament from moving right. Dirt or old plastic inside can cause under extrusion and gaps. Try a cold pull to clean the nozzle. If that does not work, change the nozzle. Make sure the hotend heats up the same everywhere. If it does not, you get weak layers and uneven extrusion.
Temperature Fluctuations
Temperature changes can affect how much filament comes out. If it is too cold, the plastic does not flow well. This causes under extrusion. Higher heat helps layers stick better. But too much heat can make prints weak. For example, PLA is stronger at 200°C than at 190°C. But printing over 250°C can make it weaker. Use a steady temperature for your material.
Tip: Always check your printer’s temperature before you print.
Extruder Gear and Tension
The extruder gear pushes filament into the hotend. If tension is too low, filament slips and does not feed right. Too much tension wears out the filament and gear. This causes uneven extrusion. Adjust the tension so filament moves smoothly. Calibrate your extruder steps/mm to feed the right amount.
- Low tension: Filament slips or strips and makes gaps.
- High tension: Filament wears out and flow is uneven.
- Proper tension: Filament moves well for good prints.
Slicer Settings and Flow Rate
Wrong slicer settings can cause under extrusion. If flow rate is too low, not enough plastic comes out. This makes weak layers and gaps. Change the flow rate in your slicer to match your filament and printer. Print a test object to see if layers look solid.
Filament Path and Spool Movement
Things in the filament path can stop it from moving right. Clumps or dirt in the extruder block the flow. If the spool does not move well, it can jam or tug. This causes uneven extrusion. Check the filament path for bends or friction. Make sure the spool holder lets the filament unwind easily.
|
Cause |
Explanation |
|---|---|
|
Changes in heat can cause too much or too little extrusion. |
|
|
Inconsistent filament diameter |
Uneven thickness makes flow unpredictable and weak spots. |
|
Filament-related issues |
Bad or wet filament causes missing layers and rough prints. |
|
Clogged nozzle |
Blockages stop filament and cause jams or gaps. |
|
Mechanical extruder issues |
Gear or tension problems stop filament from moving right. |
Diagnosing Inconsistent Extrusion 3D Printing
Mechanical vs. Material vs. Settings
When you have inconsistent extrusion, you need to check three things. These are mechanical parts, the material, and your settings. Mechanical problems can make the print look rough or have weird lines. Material problems can stop the filament from feeding right. Settings mistakes can make the printer not put down enough plastic or leave gaps.
|
Cause |
Suggested Solutions |
|---|---|
|
Incorrect filament size |
|
|
Low extrusion temperature |
Increase extruder temperature |
|
Clogged nozzle or extruder |
Clear filament path and calibrate extruder |
Mechanical checks help you find worn gears or loose belts. Material checks show if the filament is wet or not even. Settings checks look at slicer flow rate and temperature.
Isolation Tests and Checks
You can use easy tests to find out what is wrong. Print a small test cube first. Look at the top to see if it is smooth and even. If you see gaps or bumps, check your filament and nozzle. If you see stringing or blobs, try changing temperature and retraction. If the size is wrong, check your step calibration. If bridges are bad or the surface is rough, change slicer settings.
Tip: Only change one thing at a time. This makes it easier to find the problem.
|
Evidence Type |
Description |
|---|---|
|
Mechanical Properties |
Different strategies change thermal history and mechanical strength. |
|
Testing Methods |
Use tensile testing and infrared thermography to analyze print quality. |
|
Findings |
Direct prints show better mechanical parameters than those from large parts. |
Avoiding Misdiagnosis
Many people guess wrong about extrusion problems. You might think wet filament is the reason for stringing or weak layers. But the real problem could be a dirty nozzle or wrong print settings. Always check your hardware and slicer settings before blaming the filament.
- People forget to clean the nozzle.
- Wrong slicer settings can cause under extrusion.
- Filament not feeding right can come from mechanical problems.
You can fix most extrusion problems by following steps one by one. Careful testing and watching your prints helps you avoid mistakes and get better 3d prints.
Fixing Inconsistent Extrusion
Adjusting Temperature and Speed
You can fix extrusion problems by changing temperature and speed. Start by heating the extruder to a lower temperature than normal. This helps the first layer stick and stops warping. The best temperature for PLA depends on its color and brand. Some filaments need more heat, others need less. Always check the filament package for the right temperature. Run a temperature tower test to find the best setting.
If you see under extrusion, raise the nozzle temperature a little. Print speed matters too. Slow speeds help the filament move smoothly. Fast speeds can cause gaps and weak layers. Change the extrusion multiplier in your slicer if lines look uneven. Try different speeds and temperatures until layers look solid.
Tip: Print a small cube at different temperatures and speeds. Compare the cubes to find the best settings for your filament.
Cleaning or Replacing the Nozzle
A clean nozzle helps keep extrusion steady. Dirt and old plastic can block the nozzle. This causes under extrusion. Clean the nozzle often to stop filament from building up. Use a cold pull to get rid of stuck debris. If cleaning does not work, put in a new nozzle.
Cleaning the nozzle makes prints look better. You will see smoother layers and stronger parts. A clean nozzle also stops stringing and keeps extrusion even. After cleaning, prints can look almost new. Make nozzle cleaning part of your regular printer care.
- Clean the nozzle with a cold pull or needle.
- Replace nozzles that are worn or damaged.
- Check for filament buildup after every few prints.
Calibrating Extruder Steps/mm
Calibrating steps per millimeter helps fix extrusion problems. This makes sure the extruder pushes out the right amount of filament. Measure how much filament comes out and adjust the steps/mm setting.
New Steps/mm = (Old/Current steps/mm) x [100 / (measured distance filament traveled)]
Follow these steps:
- Mark the filament 120mm from the extruder.
- Set the filament flush with the Bowden tube.
- Extrude 100mm using your printer controls.
- Measure the leftover filament. If it is not 20mm, use the formula to get new steps/mm.
- Repeat until you get exactly 100mm extruded.
Calibrating steps/mm stops over-extrusion and under extrusion. Do this when you set up a new printer or change the extruder.
Tuning Extruder Tension and Gears
Adjust the extruder tension and check gear alignment for good extrusion. The right tension lets the gears grip the filament well. If tension is too low, the filament slips. If tension is too high, the filament gets damaged.
Check the gear alignment. If gears are not straight, filament does not feed right. This causes extrusion problems. Make sure gears are straight and tension is balanced. Test by feeding filament by hand and watch for smooth movement.
Note: Good tension and gear alignment keep filament moving steady and protect it from damage.
Optimizing Flow Rate and Slicer Settings
Slicer settings are important for good extrusion. Check the extrusion multiplier, layer height, and print speed. Use the table below to help you adjust:
|
Setting |
Common Issues |
|
|---|---|---|
|
Extrusion Multiplier |
1.0 - 1.1 |
Over or under-extrusion due to incorrect calibration. |
|
Layer Height |
0.1mm - 0.3mm |
Too high may lead to poor adhesion and flow. |
|
Print Speed |
30 - 80 mm/s |
Excessively high speeds can lead to under-extrusion. |
Set the extrusion multiplier to match your filament. Lower the layer height for better details. Slow down print speed if you see gaps or rough spots. Always print a test object to check your settings before big projects.
Improving Filament Handling
Good filament handling helps stop extrusion problems. Use filament with a steady diameter. Measure the filament diameter in a few places with calipers. Put the average diameter into your slicer for better results. Calibrate the thread width to keep outside sizes correct.
Store filament in a dry box or sealed bag to keep out moisture. Wet filament causes bubbles and weak prints. Try brands with better quality control if you see lots of changes. Always check filament before loading it into the printer.
- Adjust flow rates for steady extrusion.
- Use the right nozzle temperature for each filament.
- Measure and enter the real filament diameter.
- Pick high-quality filament for best results.
Tip: Trust your own measurements more than the label on the spool. This helps you avoid problems while printing.
You can fix inconsistent extrusion by following these steps. Change temperature and speed, clean the nozzle, calibrate steps/mm, tune tension and gears, adjust slicer settings, and handle filament carefully. Each step helps you get strong, smooth, and reliable 3D prints.
Preventing Inconsistent Extrusion
Maintenance Habits
You can prevent extrusion problems by building good maintenance habits. Regular care keeps your printer working smoothly and helps you avoid surprises during a print.
- Check and tighten belts and gears often. Loose parts can cause the print head to move unevenly.
- Clean the nozzle frequently. A clean nozzle lets filament flow without clogs.
- Lubricate moving parts. Smooth movement reduces stress on the extruder and keeps prints consistent.
- Store filament in a dry place. Moisture can ruin filament and lead to weak prints.
- Review slicer settings before each print. Small changes can make a big difference in print quality.
Tip: Set a reminder to clean and check your printer every week. This habit helps you catch problems early.
Pre-Print Checks
Before you start a print, run a few quick checks. These steps help you spot issues before they affect your model.
- Measure filament thickness in several spots. Consistent diameter gives you even layers.
- Print a small test object. Use it to adjust flow rate and slicer settings for your filament.
- Check the printer’s heating components. Stable temperature keeps extrusion steady.
A simple checklist can save you time and filament. You will notice fewer gaps and smoother surfaces when you check these things first.
Best Practices for Long Prints
Long prints need extra attention. You want to avoid problems that can ruin hours of work.
- Match the filament type with the right feed length, temperature, and speed. Each material works best with specific settings.
- Monitor printing temperature. Too much heat can cause stringing or blobs.
- Adjust feed length carefully. Shorter feed lengths help prevent over-extrusion, especially with direct extruders.
Note: Stay nearby during the first hour of a long print. Watch for signs of uneven extrusion and make small adjustments if needed.
By following these habits and checks, you can keep your printer running well and enjoy strong, smooth prints every time.
Common Mistakes to Avoid
Changing Too Many Variables
If you try to fix extrusion problems, you might want to change many settings at once. This makes it hard to know what is helping. If you change temperature, flow rate, and gear tension together, you cannot tell which one worked. You should only change one setting at a time. Watch how your printer acts after each change. This helps you find the real problem.
Tip: Write down every change you make. This helps you remember what works and what does not.
Common mistakes when changing variables:
- Changing many slicer settings at the same time
- Switching both filament and nozzle without testing first
- Adjusting speed and temperature together
Overcompensating Settings
You might think big changes will fix your print fast. But making large changes can cause new problems. If you raise the temperature too much, the filament can droop or make blobs. If you make tension too high, the filament can break or grind. Small changes work better.
A clogged nozzle or unstable temperature can also cause gaps or jams. Check these things before you change your settings a lot.
|
Setting |
Problem When Overcompensated |
Recommended Action |
|---|---|---|
|
Temperature |
Blobs, drooping, weak layers |
Change in small steps |
|
Tension |
Filament grinding or slipping |
Find a good balance |
|
Flow Rate |
Over-extrusion or under-extrusion |
Test with small prints |
Neglecting Filament Condition
Sometimes people forget to check their filament before printing. Wet filament, tangles, or uneven thickness can cause weak spots and gaps. If the filament is brittle, too much pressure can grind it up. If pressure is too low, the filament slips and does not feed well.
Filament quality depends on how it was made and stored. Measure the diameter and look for knots or rough places. Keep filament in a dry spot to keep it strong and smooth.
Remember: Good filament makes strong prints. Always check and handle your filament carefully.
You can fix inconsistent extrusion by looking at belts and gears. Make sure all parts are tight before you print. Run a test print to check for problems. Troubleshooting step by step helps you find what is wrong. This makes your prints better and saves time and filament. Clean your printer and nozzle often to keep it working well. Check cables and moving parts so nothing gets stuck. Put oil on parts that move to help them work smoothly. Check if everything lines up right. When you learn about your printer and take care of it, your prints get stronger and smoother every time.
FAQ
What causes inconsistent extrusion in 3D printing?
Inconsistent extrusion can happen for many reasons. Filament can get wet and cause problems. A clogged nozzle can block the plastic. If the extruder tension is not right, it may slip. Bad slicer settings can also make prints look bad. If the filament path is rough, the filament may not move well. Always check each part before you start printing.
How do I know if my nozzle is clogged?
You might see gaps or thin layers in your print. Sometimes you hear clicking from the extruder. If the filament does not come out smooth, the nozzle may be blocked. Try a cold pull or use a needle to clean it.
Can filament quality affect print consistency?
Filament quality is very important for good prints. Cheap or old filament can be uneven or wet. This can make your prints weak or have gaps. Always keep filament dry and measure its thickness before you print.
Should I adjust print speed to fix extrusion issues?
Lowering print speed can help if you see gaps or rough spots. Slow speeds let the extruder push filament better. Fast speeds can cause under-extrusion, especially with tough or bendy filament.
How often should I calibrate my extruder?
Calibrate your extruder when you change filament brands. Do it if you swap nozzles or see bad prints. Regular calibration helps your printer use the right amount of filament.


