


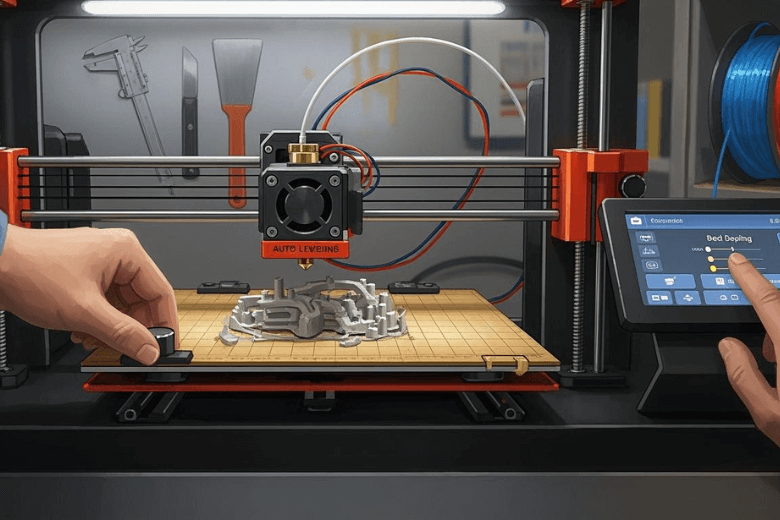
I use automatic bed leveling to let my 3D printer’s sensor probe the surface and adjust the nozzle for a level 3d printer bed. This technology helps me achieve more precise first layers and reduces print failures. When I rely on automatic leveling, I notice smoother prints and fewer headaches. Anyone can use this feature, no matter their experience with 3D printing.
Key Takeaways
- Gather essential tools like a microfiber cloth and isopropyl alcohol before starting the leveling process.
- Keep the printer bed clean to ensure accurate sensor readings and better print adhesion.
- Run the automatic bed leveling sequence by accessing the printer menu and monitoring Z readings for accuracy.
- Always save the leveling data after probing to ensure the printer adjusts the nozzle height correctly.
- Perform a test print after leveling to check for even first layer lines and make adjustments if necessary.
Prepare for Automatic Bed Leveling
Gather Tools and Materials
Before I start the automatic bed leveling process, I always gather the right tools and materials. I make sure I have a clean microfiber cloth, 91% or higher isopropyl alcohol, and a paper towel. If my printer uses a removable bed surface, I keep it handy. I also check that my leveling sensor is secure and that I have access to my printer’s menu.
Clean and Ready the Printer
A clean bed surface is essential for accurate 3d printer bed leveling. I follow a regular cleaning routine to remove dust, oils, and filament residue. Here’s a quick reference table I use:
|
Cleaning Method |
Frequency |
Instructions |
|---|---|---|
|
Hot Water Wash |
Often, as needed |
Wash the bed with hot water and a few drops of dish soap, rinse well, and dry with a paper towel. |
|
Alcohol Rinse |
Every few prints |
Use 91%+ alcohol to scrub the bed with a paper towel to remove PLA residue. |
|
Streak Test |
When contamination is suspected |
Dampen a paper towel with alcohol and wipe the bed; streaks indicate the need for cleaning. |
|
Acetone Wash |
Infrequent |
Use acetone to scrub the bed, removing PEI oxides and improving adhesion. |
I always perform a streak test if I suspect contamination. Cleanliness helps the sensor read the bed surface correctly and improves print adhesion.
Check Firmware and Sensor Setup
I never skip checking my firmware and sensor installation. I confirm my printer runs firmware that supports my auto-leveling sensor, such as Unified 2, Klipper, or Marlin. These versions work well with popular sensors like the EZABL NG kit.
Tip: I make sure the sensor is mounted securely and sits at the correct height. In my experience, a properly installed sensor, like the 3DM Touch, gives me consistent first layer heights even when the bed heats up. If I notice uneven layers, I double-check the sensor’s position and wiring.
I also verify the bed is flat and at the right distance from the nozzle before starting the automatic sequence. Proper preparation, including cleaning and setup, leads to more reliable leveling and better print results.
Run Automatic Bed Leveling Sequence
Access Leveling Feature in Printer Menu
I always begin the abl process by navigating to the leveling menu on my printer’s display. Most modern 3D printers include an option labeled “Bed Leveling,” “Auto Level,” or “ABL.” I select this feature to start the calibration. Some printers require me to preheat the bed before running the sequence. I make sure the bed reaches the target temperature because heat can cause slight warping. This step ensures the sensor reads the bed surface as it will be during an actual print.
Start Probing and Monitor Z Readings
Once I activate the abl routine, the sensor moves across the bed and probes multiple points. I watch as the nozzle gently taps or hovers above each spot. The printer records the Z readings at every location. These measurements help the printer create a topographic map of the bed surface. This map allows the printer to compensate for any dips or high spots during printing.
I pay close attention to the display as the probing happens. If I see any errors or if the sensor misses a point, I pause and check for obstructions or loose wiring. I have found that the type of sensor can affect the accuracy of the readings. In my experience, the Physical-Hall Effect sensor performs best in real-world conditions, especially when the bed surface or temperature changes. Inductive and capacitive sensors work well in controlled environments, but the Hall Effect sensor gives me more reliable first layer results.
- In controlled environments, all three sensor types (Inductive, Capacitive, Physical-Hall Effect) show similar accuracy for a 0.24mm thick first layer.
- The Physical-Hall Effect sensor outperforms others when the build surface or temperature varies.
- Real-world performance often favors the Physical-Hall Effect sensor over non-contact sensors.
Save Leveling Data
After the printer finishes probing, I save the leveling data. Some printers prompt me to confirm this step, while others store the information automatically. Saving the data is critical because it tells the printer how to adjust the nozzle height at each point on the bed. I always double-check that the data has been saved before starting a print.
At this stage, I fine-tune the Z offset to achieve the perfect first layer squish. The Z offset determines how close the nozzle gets to the bed during printing. I use the following table to guide my adjustment, depending on the build plate type:
|
Build Plate Type |
Recommended Z Offset Adjustment Range |
|---|---|
|
Textured plate |
-0.01mm to 0.03mm |
|
Non-textured plate |
0.01mm to 0.05mm |
I adjust the Z offset within these ranges to get the right amount of squish for the first layer. Too much squish can cause the filament to spread too thin, while too little can lead to poor adhesion. I always test with a small print to confirm the calibration.
Tip: I keep a close eye on the first layer after every abl sequence. If I notice uneven lines or gaps, I adjust the Z offset slightly and rerun the leveling if needed. Consistent abl and careful calibration help me achieve smooth, reliable prints every time.
Verify 3D Printer Bed Leveling Results
Test Print First Layer
After I finish the automatic leveling process, I always run a test print to check the results. I prefer using a simple calibration model designed for this purpose. One of the most reliable options is the Bed Leveling Calibration (Parametric) file by pgreenland on Thingiverse. Many users have found success with this model, and it has over 100 remixes. This print helps me see how well the bed is leveled and if the first layer adhesion meets my expectations.
I also use a piece of standard printer paper to check the nozzle distance at the corners and center of the bed. I gently slide the paper under the nozzle and feel for slight resistance. This quick test gives me confidence before I start the actual print.
Inspect Layer Consistency
Once the test print begins, I focus on the first layer. I look for even, smooth lines across the entire bed. Consistent lines mean the nozzle maintains the correct distance from the bed at every point. If I see gaps between lines, the nozzle sits too high. If the lines look squished or textured, the nozzle is too low. I sometimes create a visual map of the bed by noting the height at each measuring point. This helps me spot any significant variations, which can range from 6.47 to 8.0 in some cases.
A nicely consistent first layer tells me the leveling process worked. I always check for good first layer adhesion because it sets the foundation for the rest of the build.
Adjust if Needed
If I notice any issues with the first layer, I make adjustments right away. I access the calibration menu on my printer, usually found under LCD Menu > Calibration > Bed level correction. I adjust the left, right, front, or rear values based on what I see. I make changes in small increments, usually +/- 10 to the baseline Live Z value. A negative value brings the nozzle closer to the bed, while a positive value moves it away. I repeat this process and run another test print until I achieve the perfect first layer.
Tip: I always check the first layer at multiple points on the bed. Consistent results across the entire surface mean the printer is ready for any project.
Troubleshoot Automatic Bed Leveling
Common Issues and Solutions
When I run abl on my 3D printer, I sometimes encounter problems that affect the bed leveling process. I always start by cleaning any buildup on the nozzle tip and making sure the bed is free of debris. If the plate looks misaligned, I reseat it before continuing. I inspect the bed for loose filament or anything that could block movement. I check that the hot end is clipped in securely and the nozzle is tight. These steps often resolve unstable connections and prevent failed leveling attempts.
If the abl sequence fails, I follow these troubleshooting common bed leveling issues:
- I confirm the hotend is fully inserted into the extruder.
- I perform Z calibration through the LCD menu, which also helps level the X-axis.
- I try to resume calibration or restart the print, depending on when the error occurred.
- If problems continue, I redo the entire calibration process.
Sensor errors can also cause issues. I verify that the PINDA sensor is connected to the electronics board and inspect the cable for damage. I refer to the sensor testing guide if I suspect a malfunction. I always check for loose wires and nearby vibration, since these can confuse the machine and affect abl accuracy.
Tips for Consistent Leveling
To maintain reliable bed leveling over time, I follow a strict maintenance routine. I regularly check and level the bed to ensure the nozzle maintains the correct distance from the build plate. I clean the build plate to remove debris that could affect adhesion or leveling accuracy. I keep the belts and screws tight to prevent misalignment during operation.
|
Maintenance Routine |
Description |
|---|---|
|
Regular bed leveling checks |
Ensures consistent distance between the nozzle and build plate, crucial for print quality. |
|
Cleaning the build plate |
Removes debris that can affect adhesion and leveling accuracy. |
|
Ensuring proper tension of belts and screws |
Maintains the mechanical integrity of the printer, preventing misalignment during operation. |
Environmental factors play a big role in abl reliability. I maintain a stable ambient temperature to prevent warping and layer separation. I control humidity, keeping it between 30-50%, so filament does not absorb moisture and affect the first layer. I minimize vibration around the printer to help the bed leveling system perform at its best.
For sensor calibration, I clear any pre-existing z-offset values, move the nozzle to the actual Z-offset position, and use a piece of paper to find the correct squish for the first layer. I note the z-offset on the printer’s LCD for future reference.
By following these steps, I keep my bed leveling process consistent and my prints looking sharp. I always address issues quickly to avoid failed prints and wasted filament.
I follow these steps every time I use automatic bed leveling: prepare the printer, run the leveling sequence, and check the first layer. This method gives me reliable results and helps me avoid common print issues.
- Manual leveling success rate: 60%
- Automatic leveling success rate: more than 90%
Regular use of automatic bed leveling reduces strain on my printer’s parts and extends its lifespan. To keep my bed level, I always clean the surface, heat the bed before leveling, and check for proper alignment after any changes.
FAQ
How often should I level a 3d printer bed with abl?
I run abl before every major print job and after changing the build plate. Regular checks help me maintain a well-leveled bed and avoid print failures. I find that frequent abl keeps my printer ready for any project.
Can I use automatic leveling bed on any printer?
I use automatic leveling bed features on most modern printers. Some older models require upgrades or a sensor installation. I always check my firmware and hardware compatibility before starting the process.
What is the difference between abl and manual bed leveling process?
I use abl to let the printer’s sensor probe and adjust the bed automatically. The manual bed leveling process requires me to adjust screws and measure with paper. I prefer abl for speed and accuracy when I need to level a 3d printer bed.
Why does my first layer look uneven after leveling your 3d printer bed?
I check the Z offset and rerun abl if I see uneven lines. Sometimes, debris or a loose sensor causes problems. I always clean the bed and use a bed leveling test model to confirm a perfectly calibrated print bed.
How does understanding automatic bed leveling improve print quality?
Understanding automatic bed leveling helps me achieve consistent first layers. I get better adhesion and fewer failed prints. A level a 3d printer bed is the foundation for high-quality results.


