


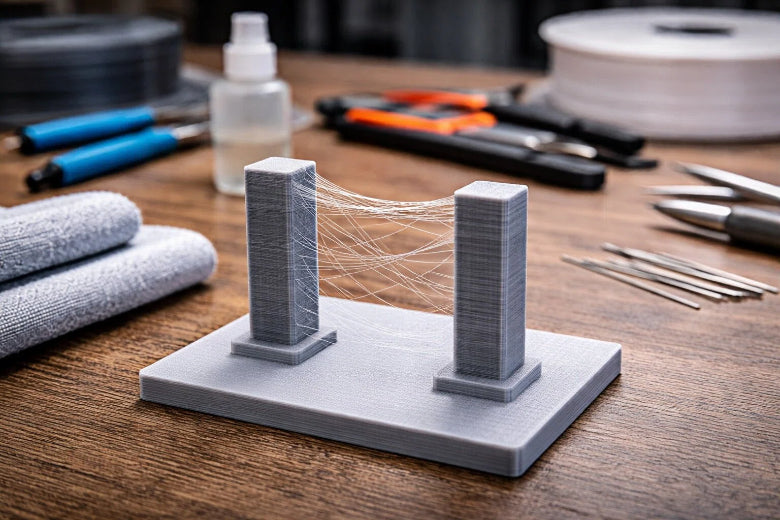
To learn how to reduce stringing in your 3D prints, start by adjusting your retraction and temperature settings. Stringing occurs when thin plastic strands appear due to the nozzle leaking plastic while it moves. This issue often arises if the nozzle temperature is too high or if the retraction settings are not optimized. Implementing these simple adjustments can significantly improve the appearance of your prints quickly.
Key Takeaways
- Change retraction settings in your slicer to pull back filament and stop stringing. Begin with the suggested distances for your printer type.
- Lower the nozzle temperature to help stop stringing. Try different temperatures to see which works best for your filament.
- Make sure your filament is dry and clean your nozzle often. Wet filament and dirt can cause stringing, so storing and taking care of your printer is important.
How to Reduce Stringing with Retraction Settings
Stringing can ruin the look of your 3d prints. You can fix stringing by learning how to reduce stringing with the right retraction settings. Retraction pulls melted filament back into the nozzle when the printer moves between parts. This stops plastic from leaking and forming thin strands. Retraction settings play a big role in 3d printing stringing. Different printers and filaments need different adjustments. You can use slicer settings to control retraction and reduce stringing.
Enable Retraction in Your Slicer
You must turn on retraction in your slicer before you can adjust any settings. Most slicers like Cura and PrusaSlicer make this easy.
Step-by-step instructions:
- Open Cura Slicer.
- Click the Print Settings bar.
- Type "Wipe" in the search box.
- Scroll down and enable "Wipe Nozzle between layers."
- Adjust retraction settings until you see less stringing.
For PrusaSlicer:
- Launch PrusaSlicer.
- Click the Search Icon.
- Type "Wipe" in the search box.
- Select "Wipe while Retracting."
- Enable the setting and tweak retraction settings.
Tip: Always enable retraction before changing other settings. This is the first step in how to reduce stringing.
Set Retraction Distance
Retraction distance tells the printer how far to pull the filament back. If you set the distance too low, you will see more stringing. If you set it too high, you may get clogs or jams. You need to find the right balance for your printer and filament.
Retraction distance recommendations:
|
Extruder Type |
Recommended Retraction Distance |
|---|---|
|
Direct Drive |
1–2 mm |
|
Bowden-type |
5–8 mm |
|
Filament Type |
Retraction Distance |
Notes |
|---|---|---|
|
PLA (Bowden) |
2–4 mm |
Easy to tune |
|
PLA (Direct) |
1–2 mm |
Clean edges |
|
PETG (Bowden) |
3–5 mm |
Lower speed helps |
|
PETG (Direct) |
1–2 mm |
Needs careful tuning |
|
ABS (Bowden) |
2–4 mm |
Watch for oozing |
|
ABS (Direct) |
1–2 mm |
Adjust for your setup |
Longer retraction distances can reduce stringing by pulling the filament back further. However, too much distance can cause jams or slow down your print. Most slicers start with a default distance around 6 mm, but you should adjust this for your setup. Start with the recommended values and increase or decrease in small steps.
Note: Use the minimum distance needed to reduce stringing. Excessive retraction can cause problems.
Adjust Retraction Speed
Retraction speed controls how fast the printer pulls the filament back. If the speed is too slow, stringing may happen. If the speed is too fast, the filament can break or grind.
Retraction speed recommendations:
|
Setting Name |
Recommended Value |
|---|---|
|
Retraction Speed (Direct Drive) |
|
|
Retraction Speed (Bowden) |
50–70 mm/s |
- For direct drive extruders, use 25–35 mm/s.
- For Bowden tube printers, use 50–70 mm/s.
Change the speed in small steps. Watch your prints for signs of stringing or filament damage. If you see stringing, try increasing the speed. If you see broken or ground filament, lower the speed.
Tip: Always change one setting at a time. This helps you see what works best for your printer.
Test and Troubleshoot Retraction
After you adjust retraction distance and speed, print a test model. Look for signs of stringing. If stringing persists, try these troubleshooting steps:
- Increase travel speed in your slicer settings to reduce stringing.
- Enable combing to minimize travel moves over open spaces.
- Lower printing temperature to reduce oozing.
- Dry your filament to prevent moisture-related stringing.
- Clean the nozzle regularly to ensure stable extrusion.
|
Mistake |
Explanation |
|---|---|
|
Makes prints slower and can cause clogs. |
|
|
Using too much retraction speed |
Can break or grind filament. |
|
Not changing minimum travel retraction |
Can damage filament in small areas. |
You can use slicer recommendations as a starting point. Change one setting at a time and print a test. This is the best way to learn how to reduce stringing in 3d printing. With patience and careful tuning, you will reduce stringing and improve your print quality.
Lowering Temperature to Prevent Stringing
Stringing happens when melted filament leaks out as the nozzle moves. High nozzle temperatures make stringing worse. You can fix stringing by using the right temperature settings. Lower print temperature helps control filament flow. This stops extra strands from forming.
Find the Right Nozzle Temperature
You need to know how nozzle temperature affects stringing. If the nozzle temperature is too high, the filament gets very runny. This can cause over-extrusion. Over-extrusion leads to stringing and oozing. If you set the print temperature too low, you might get under-extrusion. Under-extrusion makes weak prints and leaves gaps.
Material science research shows:
- Higher nozzle temperatures can cause over-extrusion. This makes stringing and oozing worse because the filament is more runny.
- Lower temperatures can cause under-extrusion. This can make your prints fall apart.
- You need to find the best nozzle temperature. This helps stop stringing and keeps your prints strong.
Always check the recommended temperature range for your filament. Use the table below to find a good starting point for your print temperature:
|
Filament |
Recommended Temperature Range |
|---|---|
|
PLA |
190–220°C |
|
PETG |
220–250°C |
If you use ABS, start with the manufacturer's guidelines. Most people use PLA or PETG for home 3d printing.
Test Temperature Adjustments
You can use a temperature tower to test different nozzle temperatures. This is a simple model with sections printed at different temperatures. You can see which section has less stringing and looks better.
To do a temperature tower test:
- Use a Gcode generator to make a temperature tower model.
- Print the tower. The model has five parts. The bottom uses the lowest temperature. The top uses the highest temperature.
- Make sure the temperatures are safe for your printer.
- Check each part after printing. Look for surface quality and stringing.
- Change your print temperature based on what you see.
You will see that surfaces get shinier as temperature goes up. Higher temperatures can make the surface wavy and hurt overhangs. The best temperature for less stringing is usually around 220°C for PLA and PETG. You should test your filament to find the best setting.
A temperature tower helps you pick the right print temperature. If the temperature is too high, you will see blobs and stringing. If the temperature is too low, you may see feeding problems and weak prints. This method helps you learn how to reduce stringing in 3d printing.
Tip: Always change temperature in small steps. Change by 5°C each time. Print a test model after every change. This helps you find the best settings for your filament.
Watch for Under-Extrusion
Lower print temperature can stop stringing, but you need to watch for under-extrusion. If the temperature is too low, the filament may not flow well. This can cause problems in your prints.
Look for these signs of under-extrusion:
|
Signs of Under-Extrusion |
|---|
|
Gaps between lines or layers |
|
Sparse or missing infill |
|
Weak, brittle parts that break easily |
|
Thin outer walls or incomplete perimeters |
|
Print appears 'starved' of plastic |
|
Daylight visible through the layers |
If you see any of these problems, raise your print temperature by 5°C. Print another test model and check the results. You need to balance temperature settings. This reduces stringing without causing under-extrusion.
Note: Always use the lowest temperature that gives good print quality and strong parts. This is one of the best tips for how to reduce stringing and improve your 3d prints.
You can use temperature changes with retraction settings for better results. Try different settings and write down what works best. You will learn how replace stringing and make your prints look clean and professional.
Callout: If you still see 3d print stringing after lowering temperature, check your filament for moisture and review your retraction settings. These tips help you troubleshoot and stop stringing in future prints.
Extra Tips on How to Reduce Stringing
Dry Your Filament
Filament can soak up water from the air. Wet filament can make your 3d prints stringy. When the filament is wet, it makes bubbles and steam in the nozzle. This causes bad print quality and more strings. You can dry filament in a few ways:
- Put filament in an oven with good temperature control.
- Keep filament in vacuum bags with drying packs.
- Use special drying ovens for strong materials.
- Food dehydrators can dry filament at home.
To dry filament in an oven, first heat the oven to 40°C to 50°C (104°F to 122°F). Next, put the filament on a tray with parchment paper. Dry it for 4 to 6 hours, based on how wet it is. Watch the oven so it does not get too hot.
Wet filament makes stringing worse. Keeping filament dry helps you get better 3d prints.
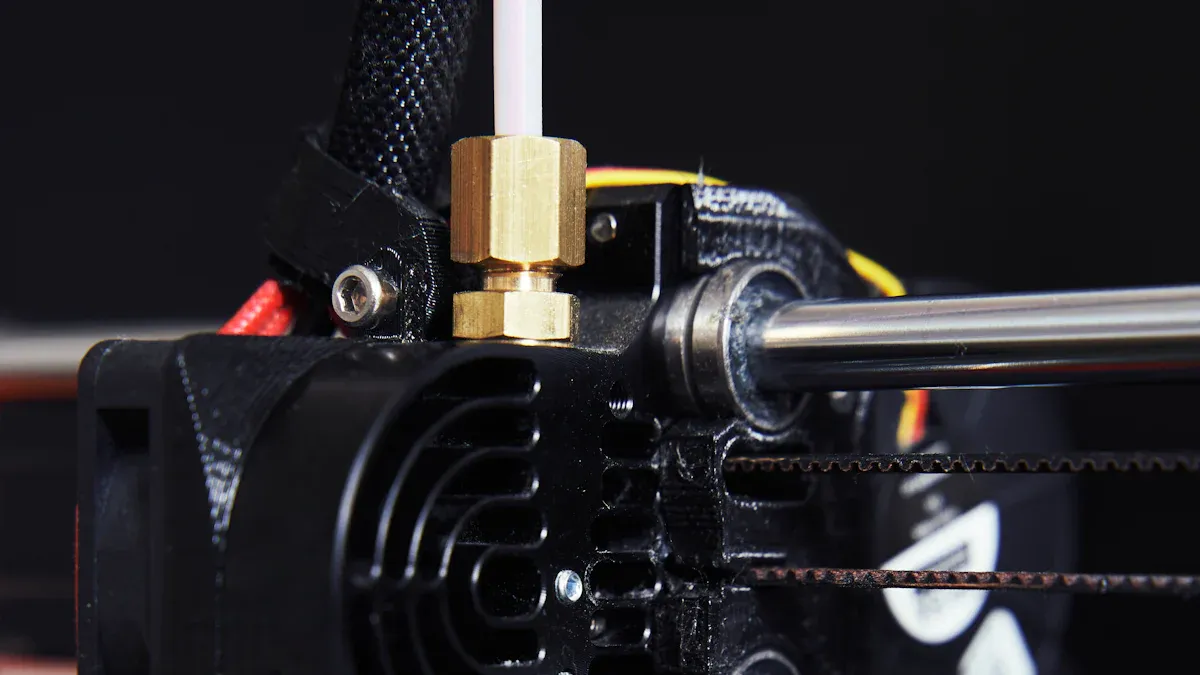
Clean the Nozzle
A clean nozzle stops stringing from happening. Dirt and old plastic can block the nozzle and make extra strings. You should clean the nozzle often:
- Heat the nozzle to the right printing temperature.
- Brush the outside with a brass brush.
- Use a 0.4mm needle to clear out clogs.
- Try a cold pull to get out burnt plastic.
Cleaning the nozzle can be hard, especially with PETG. If it does not work, try a hotter temperature or do it again.
Use Wipe and Coasting Settings
Wipe and coasting settings in your slicer can help stop stringing. Coasting stops the filament just before a line ends. This keeps extra plastic from leaking out. Wiping drags the nozzle around the edge after retraction to clean off extra filament.
|
Setting |
|
|---|---|
|
Coasting |
0.2–0.5 mm |
|
Wiping |
1–3 mm |
Change these settings in your slicer to see less stringing in your prints.
Store Filament Properly
Storing filament the right way keeps it dry and stops stringing. You should:
- Put filament in airtight boxes or vacuum bags with drying packs.
- Keep filament away from sunlight, dust, and big temperature changes.
- Use old filament first so it does not get wet.
Storing filament well helps you avoid stringing and makes 3d printing easier.
Design Tweaks
Thread size and shape can change how much stringing you get. Flatter thread shapes and printing straight up need less support and help stop stringing. Try not to use sharp angles in your designs. Calibrate your extruder for smoother prints.
You can stop stringing by changing retraction and lowering temperature. Make sure your filament stays dry. Use a checklist to help you fix problems. Even small changes can help a lot. Be patient and test each change you make. With practice, your prints will look better and have less stringing.
FAQ
What causes stringing in 3D printing?
Stringing happens when melted filament leaks from the nozzle during travel moves. High temperature, wet filament, or poor retraction settings often cause this problem.
How do you test if your filament is too wet?
You can listen for popping sounds during printing. You may also see steam or bubbles. Dry your filament if you notice these signs.
Can slicer settings alone fix stringing?
Slicer settings help a lot. You should also keep your filament dry and clean your nozzle. Good maintenance prevents stringing in future prints.


