


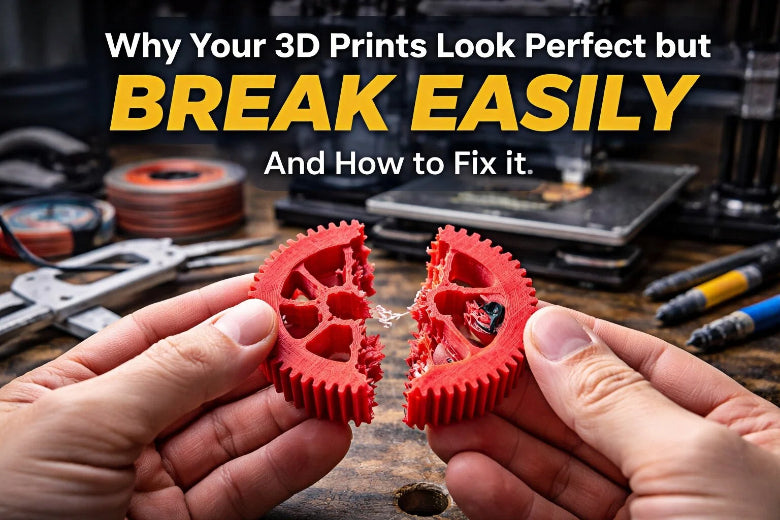
You finish a print and it looks flawless. Then you pick it up, and it snaps with barely any pressure. That’s frustrating. Many people run into this problem. Issues like weak layer bonding can cause cracks between layers, especially if the print cools too fast or the material shrinks. Sometimes poor calibration leads to under-extrusion or misalignment. Even using old filament or a weak STL file can hurt 3D Print strength. The good news? You can fix these problems with a few simple steps.
Key Takeaways
- Look at how layers stick together. Turn up the nozzle heat by 5 to 10°C. Make cooling slower to help layers bond better.
- Make sure the printer puts out enough material. Clean the nozzle often. Set up your printer right so there are no gaps or weak spots.
- Use enough infill and thick walls. Set infill to at least 30%. Make wall thickness 1.2 mm for stronger prints.
- Pick good, dry filament. Keep filament in sealed boxes. Dry it before you use it so it does not break easily.
- Make your design better. Do not use thin walls or sharp corners. Add fillets to make weak spots stronger.
Main Causes of Weak Prints
Poor Layer Adhesion
You might notice your print looks smooth, but it snaps apart along the layers. This usually means poor layer adhesion. When layers do not bond well, the print becomes weak at those points. This happens because the plastic does not fuse enough between layers. Sometimes, the print cools too quickly or the nozzle temperature is too low. Thermal gradients and leftover stress in the plastic can also make things worse.
Tip: Increase your nozzle temperature by 5–10°C and slow down the cooling fan. This helps the layers stick together better. Try printing a small test cube to check if the layers hold up when you bend it.
Under-Extrusion and Low Temperature
Under-extrusion means your printer does not push out enough plastic. You might not see this right away, but it creates gaps and weak spots inside your print. Low nozzle temperature can also cause under-extrusion. The plastic does not melt enough, so it cannot flow and bond well. This leads to brittle, fragile prints that break with little force.
Here’s a quick look at how temperature affects your print:
|
Issue |
Temperature Condition |
|---|---|
|
Weak, brittle layers |
Nozzle too cold |
|
Layers not sticking |
Nozzle too cold |
|
Not enough plastic or clogs |
Nozzle too cold |
- Under-extrusion causes gaps between lines, poor layer bonding, and air pockets. These make your print brittle and easy to break.
- Thin walls and fine details suffer most from under-extrusion. They can crumble or crack under light pressure.
Try this: Raise your nozzle temperature in small steps. Check your extruder for clogs or dirt. Make sure your filament diameter matches your slicer settings. Print a single-wall test to spot gaps or thin spots.
Infill and Wall Thickness
A print with low infill or thin walls might look fine, but it will not hold up under stress. Infill is the pattern inside your print. Wall thickness is the solid outer shell. Both play a big role in strength.
- For strong parts, use at least 50% infill. This gives your print enough support for daily use.
- For most prints, 15–50% infill balances strength and material use. Going above 60% does not add much strength but uses more filament and time.
- Thicker walls make your print sturdier. Thin walls bend or break easily.
Quick Fix: In your slicer, set infill to 30–50% for most jobs. For parts that need to be tough, go up to 50%. Set wall thickness to at least 1.2 mm (about three perimeters for a 0.4 mm nozzle).
Filament Quality and Moisture
Not all filament is the same. Cheap or old filament can have uneven thickness or poor material quality. This causes weak spots and poor bonding. Moisture is another hidden enemy. Filament absorbs water from the air. Wet filament makes prints that are rough, bubbly, and weak.
- Moisture lowers tensile strength by over 60%. Even a little water can make your print snap easily.
- Drying your filament can boost strength by 15% or more.
- PLA, PETG, and ABS all have different strengths and flexibilities. Choose the right one for your project.
|
Material |
Tensile Strength (MPa) |
Impact Resistance |
Heat Resistance (°C) |
Flexibility |
|---|---|---|---|---|
|
PLA |
50-60 |
Lower than ABS |
55 |
Rigid |
|
PETG |
40-50 |
Moderate |
70 |
Flexible |
|
ABS |
34-36 |
Highest |
98 |
Flexible |
Pro Tip: Store filament in a dry box or sealed bag with desiccant. If your prints look fuzzy or weak, dry your filament in a food dehydrator or oven at low heat for a few hours.
Thin or Fragile Design Areas
Sometimes, the problem starts in the design. Thin walls, sharp points, or tall, skinny features break easily. Overhangs that stretch too far can sag or collapse. Even if your printer settings are perfect, a weak design will not hold up.
- Avoid thin walls and sharp points. These snap during printing or when you remove supports.
- Tall, slender features can wobble or break from the nozzle’s movement.
- Overhangs beyond your material’s limit will droop or fail.
Design Check: Use your CAD software’s thickness analysis tool. Look for red or yellow areas—these are too thin. Try to keep all walls at least 1 mm thick. Add fillets or chamfers to sharp corners for extra strength.
You can fix most weak print problems by checking these five areas. Adjust your settings, use good filament, and double-check your design. Your prints will not just look great—they will last.
Diagnosing Print Strength Issues
Visual vs. Structural Strength
You might look at your print and think it’s solid. Smooth surfaces and sharp details can fool you. But looks don’t always mean strength. Sometimes, weak infill or poor layer bonding hides under a perfect shell. You should check for layer separation, thin walls, or gaps between lines. If you see tiny cracks or lines along the layers, that’s a sign of poor adhesion. Make sure your printer is calibrated. Adjust your support patterns if you notice sagging or drooping. Regular calibration helps you avoid hidden problems.
- Check for gaps between layers.
- Look for thin or cloudy spots.
- Watch for warping or cracks after printing.
Tip: If you spot any of these issues, try increasing your print temperature or slowing down the cooling fan.
Simple Durability Tests
You don’t need fancy lab equipment to test your print’s strength. You can use simple tools at home to check how tough your part really is. Here are some easy tests you can try:
|
Test Type |
Tools Needed |
Specimen Type |
|---|---|---|
|
Tensile Testing |
Fishing scale or luggage scale |
Dogbone shape |
|
Compression Testing |
Kitchen scale or bathroom scale |
Cylinder or cube |
|
Bending Testing |
Ruler, tape measure, two blocks or stands |
Beam or bar |
|
Impact Testing |
Smartphone camera, hammer |
Notched bar or disk |
Try bending or squeezing a small test piece. If it snaps or cracks, you know something’s wrong. You can also use a scale to measure how much force it takes to break or bend your print.
Spotting Hidden Weaknesses
Some problems only show up after you wash or cure your print. Parts can warp, crack, or turn cloudy if you use dirty cleaning fluid or soak them too long. If you don’t let IPA or water evaporate before UV curing, you might see white spots or cloudy films. Uneven UV exposure can cause micro-cracks or internal stress. Removing supports too quickly can damage the surface.
- Watch for warping or cracks after cleaning.
- Let parts dry completely before curing.
- Remove supports gently to avoid surface damage.
Note: Always check your filament for moisture. Wet filament makes prints weak and brittle. Store it in a dry box and dry it before printing if needed.
By following these steps, you can spot hidden weaknesses and make sure your prints are strong inside and out.
Improving 3D Print Strength

You want your prints to look good and last. Let’s break down the most effective ways to boost 3D Print strength, step by step.
Adjusting Print Settings
If your prints break too easily, your settings might need a tweak. The right settings can make a huge difference in 3D Print strength.
Common Problems:
- Prints snap along the layers.
- Parts feel hollow or weak.
- Surfaces look nice, but the inside is fragile.
Why This Happens:
- Low infill density leaves too much empty space.
- Thin shells can’t handle stress.
- Fast print speeds don’t give layers time to bond.
- Print temperature is too low for good adhesion.
What You Can Do:
-
Increase Infill Density:
For parts that need to be strong, set infill to 50% or more. This fills the inside with more material, making your print tougher. -
Thicken Shells:
Use at least 2-3 perimeters (about 1.2 mm or more). Thicker shells help your print resist bending and breaking. -
Slow Down Print Speed:
Lower your print speed. Slower prints let each layer bond better, which boosts 3D Print strength. -
Raise Print Temperature (Carefully):
Try increasing your nozzle temperature by 5–10°C. Higher temperatures help layers stick together. For example, PLA printed at 210°C is much stronger than at 190°C. But don’t go too high, or you might get warping or stringing.
Tip: Always test new settings with a small print before starting a big project.
Quick Reference Table:
|
Setting |
Weak Print |
Strong Print |
|---|---|---|
|
Infill Density |
10-20% |
50%+ |
|
Shell Thickness |
0.8 mm |
1.2 mm+ |
|
Print Speed |
60+ mm/s |
30-40 mm/s |
|
Nozzle Temp (PLA) |
190°C |
210-230°C |
Ensuring Proper Extrusion
If your printer doesn’t push out enough plastic, your prints will always be weak. Consistent extrusion is key for 3D Print strength.
Common Problems:
- Gaps between lines or layers.
- Brittle or crumbly prints.
- Prints look under-filled or stringy.
Why This Happens:
- Clogged or dirty nozzle blocks the flow.
- Worn extruder gears slip and skip.
- Filament diameter doesn’t match slicer settings.
What You Can Do:
-
Clean the Nozzle:
A clean nozzle keeps the filament flowing smoothly. If you see under-extrusion, heat the nozzle and use a cleaning filament or needle to clear any clogs. -
Check Extruder Gears:
Make sure gears are clean and tight. Lubricate if needed. -
Calibrate the Printer:
Level the bed and check your filament diameter in the slicer. Print a single-wall test to spot any gaps. -
Update Firmware:
Keep your printer’s software up to date for the best performance.
Note: Mastering extrusion means each layer sticks well to the last. This is the foundation of 3D Print strength.
Using Quality and Dry Filament
Even perfect settings can’t save a print if your filament is bad. Good filament and proper storage are essential for 3D Print strength.
Common Problems:
- Prints look rough or bubbly.
- Parts snap with little force.
- Surface feels soft or spongy.
Why This Happens:
- Cheap filament has uneven thickness or poor material.
- Moisture in filament causes weak, foamy prints.
What You Can Do:
-
Choose High-Quality Filament:
Premium brands give you better consistency and stronger prints. Some filaments have added particles, like titanium or stainless steel, to boost strength and stiffness. -
Keep Filament Dry:
Store spools in airtight containers with desiccant. Use a filament dry box or vacuum-seal bags to keep out moisture. Aim for humidity below 50%. -
Dry Filament Before Printing:
If your filament feels damp or prints look fuzzy, dry it in a food dehydrator or oven at low heat for a few hours.
Pro Tip: Always follow the manufacturer’s storage advice. Dry, high-quality filament is the secret to reliable 3D Print strength.
Optimizing Model Design
Sometimes, the design itself is the weak link. Smart design choices can make a huge difference in 3D Print strength.
Common Problems:
- Thin walls or sharp corners break off.
- Tall, skinny features wobble or snap.
- Parts fail at stress points.
Why This Happens:
- Thin sections can’t handle force.
- Sharp corners create stress risers.
- Poor orientation makes layers weak.
What You Can Do:
-
Increase Wall Thickness:
Make walls at least 2-3 mm thick for strong parts. -
Add Fillets and Chamfers:
Round off sharp corners with fillets. This spreads out stress and helps prevent cracks. Chamfers also help, but fillets work best for strength. -
Use Strong Infill Patterns:
Choose hexagonal or triangular infill for better support. -
Orient Parts for Strength:
Place your model so the layers run in the direction of the main force. This helps the print resist breaking. -
Print with Thinner Layers:
Thinner layers improve bonding between each layer, which increases 3D Print strength. -
Upgrade Materials:
For extra-tough parts, try PETG, Polycarbonate, or Tough PLA.
Design Check: Use your CAD software to spot thin areas. Add fillets to any sharp corners and reinforce weak spots before printing.
By following these steps, you can turn fragile prints into tough, reliable parts. Each fix builds on the last, so don’t skip any steps. With the right settings, clean extrusion, dry filament, and smart design, you’ll see a big jump in 3D Print strength.
You might see a perfect print, but weak infill, poor layer bonding, or thin walls can make it snap. Strong prints come from smart design, good filament, and the right settings. Try using cubic or gyroid infill, thicker walls, and higher nozzle temperatures. Align your part for strength and add fillets to sharp corners.
Keep testing and tweaking—every print teaches you something new!
Quick Checklist for Stronger Prints:
- Use high-strength infill patterns
- Dry and store filament well
- Increase wall thickness
- Avoid sharp corners; add fillets
- Check for weak, stringy infill
|
Study |
Focus |
Key Findings |
|---|---|---|
|
Shashikumar & Sreekanth (2023) |
Stronger prints with better settings |
|
|
Rezaeian et al. (2022) |
Print speed |
Slower speeds boost strength |
FAQ
Why do my prints look strong but break when I use them?
Your prints might look solid because the surface is smooth. Weak infill, poor layer bonding, or thin walls can hide inside. Always check the inside settings and test your print’s strength before using it.
Why does my filament make prints weak after a few weeks?
Filament absorbs moisture from the air. Wet filament makes prints brittle and weak. Store your filament in a dry box or sealed bag with desiccant to keep it strong.
Why do thin features or sharp corners break so easily?
Thin features and sharp corners create stress points. These areas cannot handle much force. Add fillets or increase wall thickness in your design to make them stronger.
Why does increasing infill not always make my print stronger?
After about 50% infill, extra material does not add much strength. Wall thickness and layer bonding matter more. Focus on thicker walls and better adhesion for tough prints.
Why do my prints snap along the layers?
Layers can separate if the nozzle temperature is too low or the cooling fan runs too fast. Raise the temperature and slow the fan to help layers fuse together.


