


You may notice unwanted lines or shadows on your prints. Ghosting in 3d printing often frustrates beginners, but you can fix it with simple steps. Many users solve this issue by making small changes to their printer. You do not need special tools or advanced skills.
Stay positive—every step you take brings you closer to smoother, sharper results.
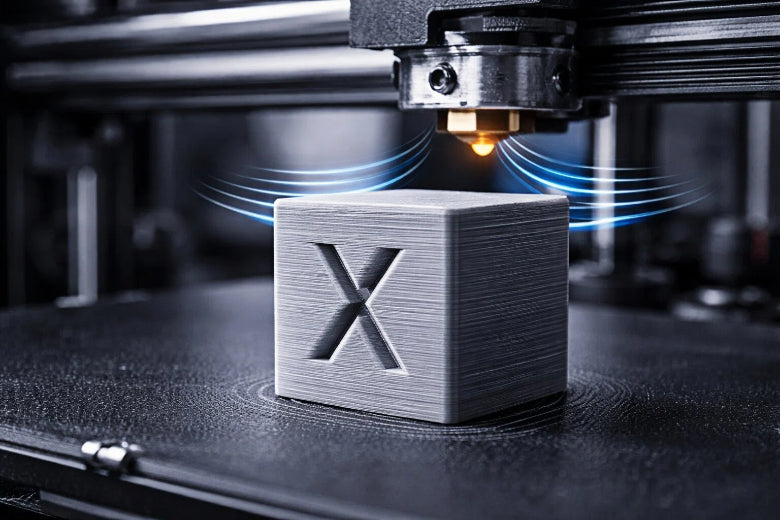
Key Takeaways
- Ghosting looks like light waves or lines on prints, often near sharp corners. Seeing these signs lets you know when to fix the problem.
- Tightening loose belts and making the printer frame steady can really help stop ghosting. Doing regular checks is important for better prints.
- Slowing down print speed and changing acceleration settings can help control how the printer moves. This makes prints smoother and lowers ghosting.
- Using damping pads or putting the printer on a steady table cuts down on shaking. This is very important to stop ghosting.
- Always test your printer after you make changes. Calibration prints show if your changes made the prints better.
What Is Ghosting in 3D Printing
Identify Ghosting on Prints
Ghosting in 3d printing happens when you see light ripples or patterns on your print’s surface. These marks show up near sharp corners, holes, or raised letters. The lines look like copies of the real shape.
Ghosting, also called ringing or echoing, is a problem in 3D printing. It shows up as light ripples or patterns on the outside of a printed part. These usually appear around sharp corners or features like holes and letters. They are unwanted copies of the real shape. This causes the print to lose quality and smoothness.
To find ghosting, look closely at your print. Hold it under a bright light. Check for places where the surface is not flat. You might see wavy lines or shadows that follow the design’s outline. These patterns are not part of the model.
Common Signs and Patterns
You can spot 3d printer ghosting by looking for these signs:
- Check for flat and even vertical sides.
- Find soft, repeating wavy lines that could mean Z-wobble.
- See clear ‘echoes’ or ripples near sharp corners or details, which show ringing or ghosting.
You might also notice light copies of the design, changes in brightness, or small spaces between the main shape and the ghosted part. The table below helps you match what you see to ghosting:
|
Pattern Type |
Description |
|---|---|
|
Ghost Images |
Show light copies of the real design, which means things are not lined up. |
|
Luminance |
Shows changes in brightness between the design and ghosted spots. |
|
Distance Deviations |
Points out spaces between the main design and the ghosted parts. |
Confirming the Issue
You can check for ghosting in 3d printing with easy tests:
- Visual Inspection: Look for light, repeating lines that follow the print’s shape.
- Calibration Models: Print cubes or towers with sharp corners to show ghosting.
- In Situ Monitoring: Watch your printer while it works. Change speed or temperature if you see problems.
Test prints like calibration cubes help you see ghosting better. These models show problems at corners and straight lines. You can use them to connect ghosting to how your printer moves. If you see ghost images, brightness changes, or spaces, you know ghosting is happening.
Causes of 3D Printer Ghosting
Ghosting in 3d printing happens when your printer shakes or moves the wrong way. You can see ghosting by finding wavy lines or echoes near sharp corners. Many problems with how the printer moves can cause ghosting.
Loose Belts and Parts
Loose belts and parts make the printer move in a shaky way. If belts are not tight, the print head can shake or stop in the wrong spot. You may see wavy lines or shapes that do not line up. Look for these clues:
- Belts feel soft or not the same as others.
- Parts shake while the printer works.
- Ghosting shows up on just one side of your print.
If you see these things, tighten the belts and check all parts. Making sure everything is tight helps stop ghosting.
Unstable Frame or Bed
A frame or bed that moves can make the printer shake. If the base wobbles, you may see ripples or layers that do not match. Watch for these clues:
- The printer shakes when it prints fast.
- The table or surface moves easily.
- Ripples or layers look uneven on your print.
Put your printer on a strong, steady table. Make sure the bed and frame do not move when printing.
High Speed and Acceleration
Printing too fast or using high acceleration can cause ghosting. Quick moves make the printer shake and leave ringing marks. The table below shows how speed and acceleration change ghosting:
|
Parameter |
Effect on Ghosting |
|---|---|
|
Print Speed |
Faster speeds make more shaking and ghosting. |
|
Acceleration |
High acceleration makes shaking worse and ghosting more. |
|
Recommended Action |
Go slower and use less acceleration to stop ghosting. |
Slow down your printer and lower acceleration for smoother prints.
Vibration Sources
Vibrations from the printer or things around it can cause ghosting. Some common sources are:
- Printer shakes or is not steady.
- Wrong acceleration and jerk settings.
- Belts that are loose or worn out.
- Machines nearby or a table that moves.
Vibrations make layers look uneven and cause ripples. Keep your printer away from big machines and use a strong table. Change acceleration and jerk settings to stop quick shakes.
Tip: Always check belts, frames, and speed before you print. Small fixes can help your prints look much better.
Fix Ghosting: Step by Step

You can fix ghosting by following a clear sequence of checks and adjustments. Start with mechanical fixes, then tune your printer’s motion settings, and finally test your results. Use this checklist to guide you:
Check and Tighten Belts
Loose belts often cause 3d printer ghosting. You should check and tighten them using these steps:
- Find the adjustment mechanism for your printer’s belts.
- Inspect the belts for slack or signs of wear.
- Loosen the mounting bolts just enough to move the belt.
- Press the belt midway with your thumb. Aim for a deflection of about 1/2 to 3/4 inch.
- For the X-axis, aim for a tension value around 250; for the Y-axis, about 275, with a tolerance of plus or minus 15.
- If tension drops below 240, loosen the belt; if it exceeds 290, tighten it.
- Hold the X-axis motor shaft with pliers and check that the extruder cannot be moved by hand.
- Tighten the bolts securely.
- Run the printer at low speed and listen for odd noises.
Tip: Do not overtighten the belts. Too much tension can damage the printer.
Secure Frame and Bed
A stable frame and bed help you fix ghosting. Follow these steps:
- Tighten all screws and bolts on the frame.
- Make sure the printer sits on a flat, sturdy table.
- Check that the bed does not wobble or shift during printing.
- Square the frame to make movement more accurate.
If you notice movement or shaking, adjust the table or surface until everything feels solid.
Lower Print Speed
High print speeds can make ghosting in 3d printing worse. You can reduce speed for better results:
- Set your print speed between 50–60 mm/s for everyday prints.
- If you see ghosting, lower the speed to 40 mm/s.
- Some materials, like PLA, print well at higher speeds. Others, like TPU, need slower speeds.
- Higher speeds can cause rough spots and defects due to less precise movements.
Note: Lower speeds give your printer more control and help reduce unwanted ripples.
Adjust Acceleration and Jerk
Motion settings like acceleration and jerk affect how your printer moves. You can fix ghosting by tuning these values:
- Lower acceleration to around 500 mm/s² to start.
- Halve the Max X & Y acceleration if ghosting continues.
- High jerk settings can cause ringing or ghosting due to rapid head movements.
- Lower jerk settings result in smoother movements and less ghosting.
- Adjust both jerk and acceleration together for best results.
|
Setting Type |
Recommended Value (mm/s) |
|---|---|
|
Print Jerk |
8–20 |
|
Travel Jerk |
10–30 |
|
Infill Jerk |
10–25 |
|
Wall Jerk |
8–15 |
|
Top/Bottom Jerk |
8–15 |
Tip: Make small changes and test after each adjustment. Lower values usually mean smoother prints.
Use Damping Pads or Stable Surface
Vibrations from the printer or table can cause ghosting. You can reduce vibrations by using damping pads or a heavy surface:
- Lamellar viscoelastic dampers control vibration well.
- DIY damper feet work for different printer models.
- Softer dampers make prints quieter and smoother.
- Place your printer on a granite chopping board or paver stone to dampen movement.
- Silicone or Sorbothane feet isolate the printer from the table.
Tip: A heavy, stable surface helps absorb vibrations and keeps your printer steady.
Test and Calibrate
After making adjustments, you should test and calibrate your printer to confirm improvements:
- Print a calibration cube or ringing test model with sharp corners and straight lines.
- Conduct ringing tests and use an accelerometer to assess vibrations.
- Perform a vertical surface test to check for ghosting or ringing.
- Examine the print’s surface for light ripples or shadows.
- Adjust printer settings incrementally, such as speed and acceleration, and print a new calibration model after each change.
Always test after each fix ghosting step. Calibration prints help you see if your changes worked.
Troubleshooting Checklist
- Check and tighten belts.
- Secure frame and bed.
- Lower print speed.
- Adjust acceleration and jerk.
- Use damping pads or a stable surface.
- Test and calibrate with a dedicated model.
You can fix ghosting by following these steps in order. Each adjustment helps you reduce 3d printer ghosting and improve print quality. Take your time and test after every change for the best results.
Advanced Tips for Persistent Ghosting
Upgrade Frame Components
You can make your printer’s frame stronger and steadier. A stiff frame helps stop shaking and bending. Thick aluminum pieces or extra brackets keep the printer from moving. Linear rails help the printer move smoothly and with more accuracy. This upgrade makes movements better and lowers ghosting. Stepper motor dampers soak up shakes from the motors. These dampers keep shakes away from the print head.
|
Upgrade Type |
Description |
|---|---|
|
Rigid frames |
Makes the printer steadier by using thick aluminum or strong brackets to stop shaking and bending. |
|
Linear rails |
Helps the printer move smoothly and accurately, so ghosting happens less. |
|
Stepper motor dampers |
Soaks up shakes from motors and keeps them from reaching the print head. |
Add Stepper Dampers
Stepper dampers help control shakes and movement. You can use lamellar viscoelastic dampers for strong results. Many people get smoother prints and less ghosting with dampers. You can make damper feet from flexible filament at home. These feet block shakes and lower noise. A damper board made of soft stuff soaks up shakes and stops ghosting. You get smoother prints and better quality.
- Vibration dampers soak up shakes and help stop ghosting.
- Lamellar viscoelastic dampers work well in tests and real use.
- DIY damper feet made from flexible filament block shakes and lower noise.
- A damper board made from soft stuff soaks up shakes and stops ghosting, making prints smoother and better.
- People use soft materials to build damper boards for better shake blocking.
Use Firmware Features
You can change firmware settings to help stop ghosting. Update firmware to make motors work better. Calibrate stepper motor drivers for smoother moves. Change acceleration and jerk settings to control speed changes. Lower numbers help stop shakes that cause ghosting.
|
Feature |
Description |
|---|---|
|
Makes motors work better and can help stop ghosting. |
|
|
Calibrate Stepper Motor Drivers |
Makes the printer move smoother and helps lower ghosting. |
|
Adjust Acceleration Settings |
Controls how fast the printer changes speed; lower numbers help stop shakes and ghosting. |
|
Adjust Jerk Settings |
Controls how quickly the printer starts or stops; lower numbers help stop shaking and ghosting. |
Avoid Common Tuning Mistakes
Do not change lots of settings at once. Make one change, then test your printer. Do not make belts or frame parts too tight. Too much tightness can break your printer. Always use test prints to check your results. If you see new problems, go back to your last good settings. Careful tuning helps you fix ghosting and avoid new problems.
Tip: Write down every change you make. This helps you remember what works best for your printer.
You can fix ghosting if you follow steps in order. First, check the printer’s belts and make sure they are tight. Next, look at the frame and make sure it does not move. Change motion settings like acceleration and jerk to lower shaking. Make one change at a time and print a test model to see if things get better.
- Changing acceleration and jerk settings helps stop shaking and ghosting.
-
Small changes and printing test models help you find and fix each 3d printing problem.
If you use these tips, your prints will look smoother and have better quality.
FAQ
What is the main cause of ghosting in 3D printing?
Loose belts or unstable frames often cause ghosting. When your printer shakes or moves too much, you see ripples on your prints. Check belts and frame first to fix most ghosting problems.
Can you fix ghosting without upgrading hardware?
Yes, you can. Tighten belts, lower print speed, and adjust acceleration settings. Place your printer on a stable surface. These steps often reduce ghosting without new parts.
How do you know if ghosting is gone?
Print a calibration cube or test model with sharp corners. Look for smooth surfaces and no repeating lines or shadows. If you see no ghost images, your fix worked.
Does print speed always affect ghosting?
High print speed usually increases ghosting. Lowering speed gives your printer more control. Try printing at 40–50 mm/s to see if ghosting improves.
Should you change many settings at once?
No, you should not. Change one setting at a time and print a test model. This helps you see what works best and avoids new problems.


